This is my first attempt at a tutorial for the copic markers. I get a lot of questions on how I get the Auburn colored hair that is my favorite. In these pictures, I used five colors of Copic markers. For the skin, I used E00, E02, and R20. For the hair, I used YR21 Cream, and E08 Brown. I am simply showing you the way I personally color my stamps. There are lots of other ways out there to achieve a wonderful finish to your poject. I must give credit to some of the other wonderful artists out there, that have taught me so much. Two of them in particular -
Claudia Rosa and
Suzanne Dean. They have some amazing Copic tutorials on their blogs and I highly recommend you watch them. Ok, on to my process. Don't forget that you can click on the photos to look at them up close. I apologize in advance for going outside of some of the lines. I didn't use my color blender to remove my messes.
First thing I do is apply R20 to the cheeks. If you apply the R20 first, you don't end up with a "halo" effect around your cheek color when you're done.
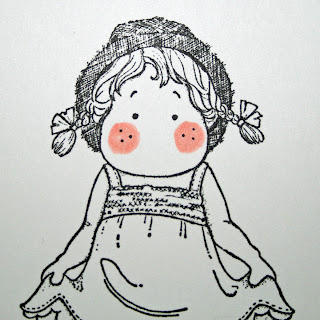
I then apply E02 to shade around the face.

Blend out with E00. I shade a little at a time. It seems to blend a little easier if you can get to it before it has a chance to dry completely. You can always still blend, even after it's dry, it's just takes a little longer.
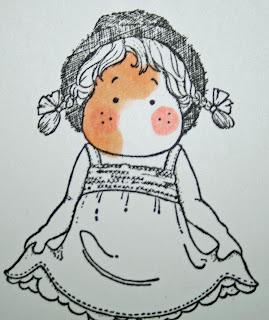
Take the shading around the rest of the face with E02

Finish blending with E00
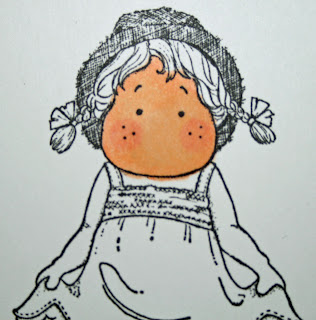
Apply shading to arms and legs
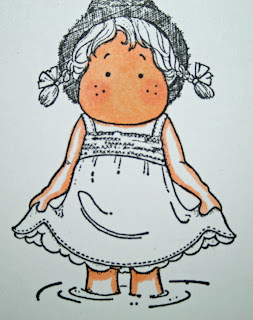
Apply R20 to knees

Blend out with E00
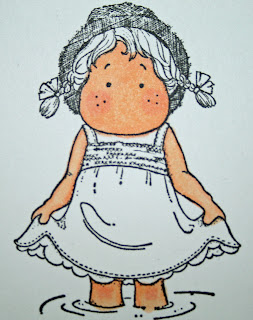
Skin is done, now it's time to move onto the hair. I use the color Cream, and completely color the hair.

Take the brown and color the crown, the edges, and the hair lines

With your cream color, blend, blend, blend....
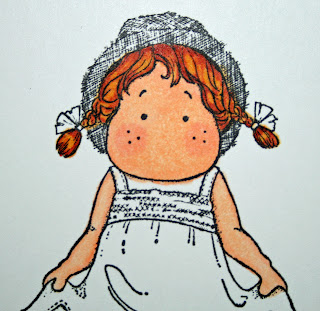
Add some brown in the same spots...crown, edges, and lines
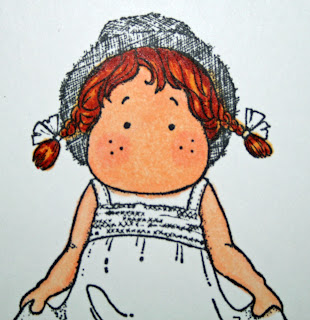
Again with your cream...blend, blend, and blend some more

Always finish by blending out with the cream. Here she is with completed skin and hair

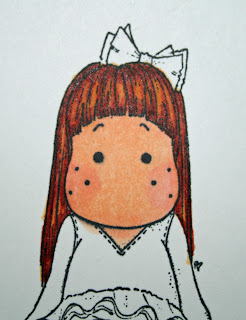
Here's one more sample with a Tilda that shows lots of skin. No commentary on this one. Just pictures. I used the same five colors as last time.
 I then apply E02 to shade around the face.
 Blend out with E00. I shade a little at a time. It seems to blend a little easier if you can get to it before it has a chance to dry completely. You can always still blend, even after it's dry, it's just takes a little longer.


 Blend out with E00
 Skin is done, now it's time to move onto the hair. I use the color Cream, and completely color the hair.
 Take the brown and color the crown, the edges, and the hair lines




.jpg)


28 comments :
Great Tutorial! You did a super job for your first one...keep them coming! LindaC
oh my sharon, this is awesome, thank you thank you so much..hugs
Excellent tutorial, Sharon. Well written and the photos are great! Thank you very much for the lesson in coloring. Hugs, Cami
Thanks for sharing. I am a newbie with these markers and this tutorial was just what I needed!
Thanks so much. I need these tutorials to get started. Your beautiful cards have made me take the dive into copics.
Love your tutorial! Please keep them coming (maybe with other color hair too). I will give your method a try. Thanks, Angela Wood
What a great tutorial! I've had the color E02 for the longest time and haven't hardly used it. This shows me a great way to incorporate this into my stamping and coloring. They're both just beautiful!
thanks Sharon - I have two red-head/auburn headed daughters and four grandchildren....they are all different colors and beautiful! I am going to try your combo next! And then make a sampler! Have you noticed how flesh colors come out different colors on different papers? I've been using the Canson Manga card-stock and really like it but I just got Beckett Expressions Radiance and it is totally awesome and the colors stay in the lines and it really colors nice! LOVE IT!
Pam Going Postal
Fantastic tutorial!! Thanks for taking the time to share with us your techniques.
Fabulous Sharon! I know I'm gonna be spending alot of time here practicing your tehnique. Thanks sooo much for doing this! Hugs! D
WOW! THANKS girlie! I really enjoyed your tutorial and want to give your steps a whirl...I'm not doing mine quite like that and your way looks much easier than mine! LOL! HUGS!
Awesome Tutorial Sharon!!!
Hugs
Vivi
Wow thanks for the tutorial Sharon must get some more Copics & realy try this .
Christine xx
Thank you so much for your tutorial. It is awesom for a first. Hope this is the first of a few tutorial. Enjoyed it and learned some new techniques..
scrappyella
scrappyella@sympatico.ca
Great tutorials. I really like how you color her hair. I also like how tan she looks. I use EOOO and EOO for the skin, probably because that is what I see when I look in the mirror (peaches and cream). I will have to play more with shadowing and putting blush on her knees. I really like that effect as well.
Thanks,
Julie
oh thank you, thank you...I just got my copics and am pretty much clueless. Now I will be waiting for Toot #2! Thanks for taking the time to help us newbies out.
Great job with your tutorials, Sharon! Thanks for listing the colors! I love your auburn hair!
Fabulous tutorial, Sharon!
Hugs~Becky
Sharon, Thanks so much for this FABULOUS tutorial!!! I must try this. TFS!!
hugs,
Rachel
Sharon, if I end up purchasing a bunch of Copic markers, I just want you to know that it's all your fault! I'm just saying! This is fantastic! You are awesome with those markers! GREAT tutorial!
wow.. thanks sweetie that you have mentioned my name. xxxx
absolutely great tutorial.. that was a lot of work but it really shows excaclty how you get it always so great done! You use different colors so i will have to give those a try!!! hugs
claudia
You are so awesome, I can't stand it!!!!
Wow, this is a fantastic tutorial. Thanks so much for sharing. I will certainly be referring back to this often.
xoxo, Christine
What a great TUT, Sharon! Wowsers! And you make it look soooo easy. I'm a newbie at coloring with Copics & have tried different techniques. I think I like yours the best. Way to go!!!
Huggies ~
Sharron
thanks for the great tutorial! You make it look so easy. Love your blog
BLessing,
Phyllis Z
Wow, thanks for the tip. I learned another coloring technique today. Too bad we don't have copics from where I come from. One day when I get hold of those copics, I'll surely look up this post coz' I have it bookmarked.
Super Tutorial Chika, love the step by step, I don't use those colors but I shall give them a shot!!
Hugs,
Patricia
Great tutorial!! I'll have to try 2 colors so far apart. Very interesting!
Post a Comment